Configure AWS RDS Mysql Instance with phpMyAdmin Easy Method
phpMyAdmin is an open-source administration tool for Mysql and Mariadb. In this quick tutorial we will learn how to integrate Amazon RDS Mysql instance with it on Ubuntu Server. Let’s configure Apache2, PHP 7.x , Mysql 5.7 Server on the server on the Ec2 instance. Follow these steps on the terminal.
Step 1:
To install apache2 on the Ubuntu 16.04/18.04. Simply execute the following command on the terminal.
sudo apt-get update
sudo apt-get install apache2 -y
Now to verify if the apache2 is active on the Ec2 instance verify the status using the following command.
sudo service apache2 status
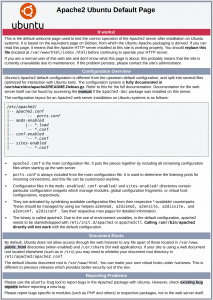
If the status appears running then its good, visit the Server IP or domain in your browser. You will get the default apache2 page on the port 80.

Step 2:
Installing PHP 7.4 version on the Ubuntu 16.04/18.04 Server.
We need to add the “ppa:ondrej/php ” PPA repository which has the latest build packages of PHP. Execute the following commands on the terminal
sudo apt-get update
sudo apt -y install software-properties-common
sudo add-apt-repository ppa:ondrej/php
sudo apt-get update
sudo apt-get install 7.4 -y
sudo apt-get install -y php-{bcmath,bz2,intl,gd,mbstring,mcrypt,mysql,zip} -y
sudo apt-get install libapache2-mod-php  -y
Installing PHP on Ubuntu 20.04
If you have Ubuntu 20.04, then simply execute the following command. As Ubuntu 20.04 has PHP 7.4 in its upstream repository.
sudo apt update
sudo apt install php php-cli php-fpm php-json php-pdo php-mysql php-zip php-gd  php-mbstring php-curl php-xml php-pear php-bcmath -y
Verify if the correct PHP version has been installed on the server. Execute the following command, the out should be following.
$ php --version
PHP 7.4.3 (cli) (built: Mar 26 2020 20:24:23) ( NTS )
Copyright (c) The PHP Group
Zend Engine v3.4.0, Copyright (c) Zend Technologies
    with Zend OPcache v7.4.3, Copyright (c), by Zend Technologies
Let’s learn how to connect AWS RDS Mysql instance with PhpMyAdmin. We need to edit the default PHPMyAdmin configuration file. Execute the following command on the terminal.
sudo vi /etc/phpmyadmin/config.inc.php
Find these lines in the configuration file.
/*
 * End of servers configuration
 */
Append the below-mentioned code in the configuration file.
$i++;
$cfg['Servers'][$i]['host'] = 'xxxxx.xxxxxxxxxx.us-ast-1.rds.amazonaws.com';
$cfg['Servers'][$i]['port'] = '3306';
$cfg['Servers'][$i]['verbose'] = 'YOUR_SERVER_NAME';
$cfg['Servers'][$i]['connect_type'] = 'tcp';
$cfg['Servers'][$i]['extension'] = 'mysql';
$cfg['Servers'][$i]['compress'] = TRUE;
replace the “xxxxx.xxxxxxxxxx.us-ast-1.rds.amazonaws.com ” with your RDS endpoint. After doing this save the file and restart the apache2 server with this command.
STEP 3:
sudo service apache2 restart
STep 4:
After configuring the default phpMyAdmin configuration file. We need to add the incoming port connection “3306” for the webserver.
STep 5:
Open phpMyAdmin on your browser, add username and password. Your RDS Mysql Instance database should be accessible.
PS: Don’t expose your Phpmyadmin on the production server to the world. If it’s important then restrict the access of phpMyAdmin to your office IP.
If you want to check the Ubuntu version then follow this article.
https://www.myserverfix.com/how-to-check-ubuntu-version-easy-step-by-step-tutorial-2020/